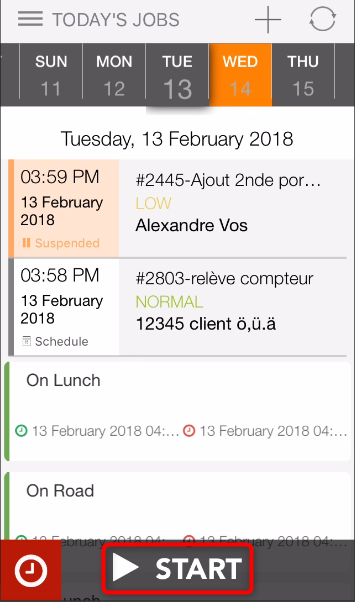
Time Tracking enables you to have a follow up on all your jobs and activities.
The Start button enables the technician to start a job or an activity
START
With the Time Tracking
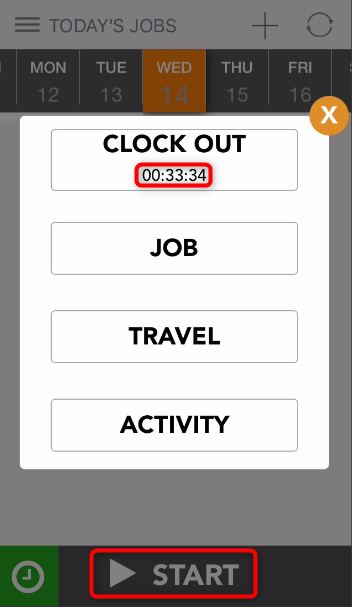
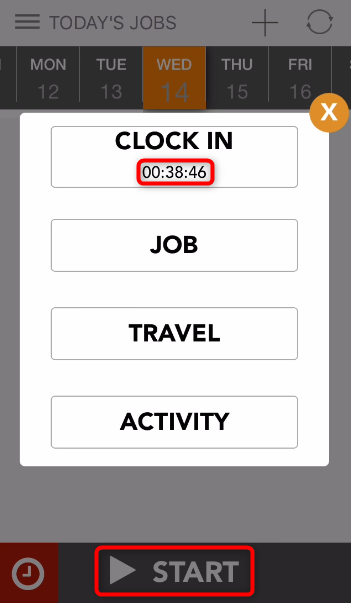
The “Start” button enables the technician for whom the time tracking has been activated to start:
- A Clock In
- A Job
- A Travel
- An Activity

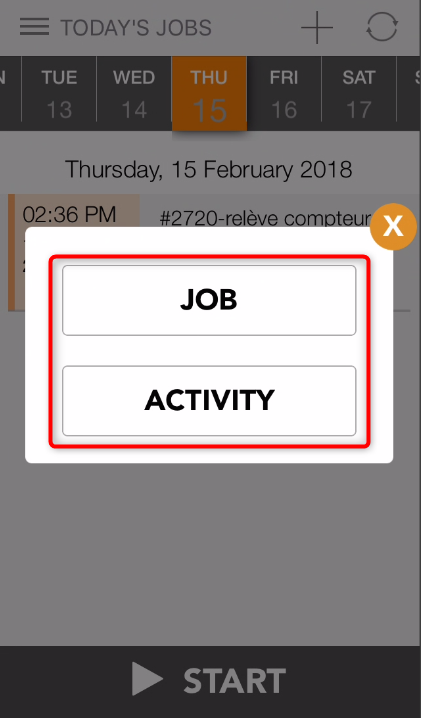
Without the Time Tracking
The “Start” button enables the technicians with no Time Tracking to start:
- A Job
- An Activity
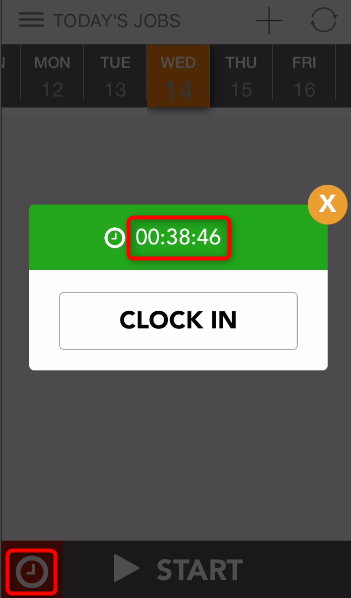
CLOCK IN / CLOCK OUT
To be in Clock In you can either:
- Go to Start > Clock In
- Or go to the red Clock icon at the bottom left > Clock In
To Clock Out:
- Go to Start > Clock Out
- Or go to the green Clock icon at the bottom left > Clock Out
DURATION
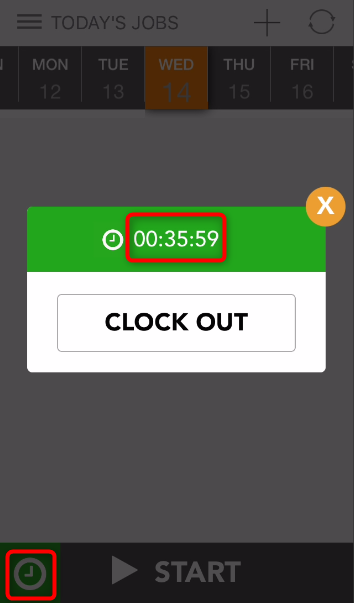
While in Clock In you can see the time for which you have started the current Clock In either by clicking on the Clock icon or by clicking on the Start Button next to it.
TOTAL DAILY CLOCK IN
You can find your Total Daily Clock In either by clicking on the Clock icon or by clicking on the Start Button next to it.
This duration is equivalent to the sum of all the Clock Ins that were started during the day.
For instance, if you have clocked in yesterday but have only clocked out today then its duration will be added to the day before and not to the current day.
Conversely, if you clock in today and clock out in 2 days then the duration of your clock in will belong to the day during which you clocked in and not the following days.
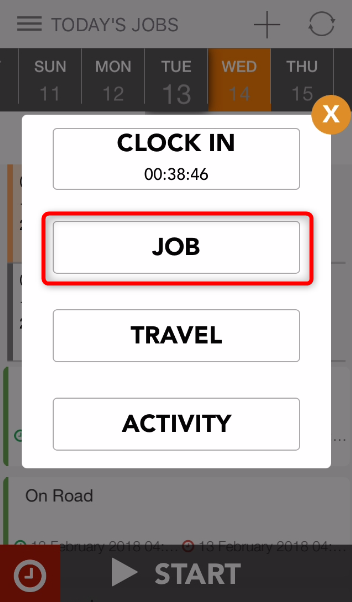
START A JOB
If the technician clicks on the button “JOB” then in order he will be directed to another window in which he can choose to go to the page with:
- Today’s Jobs
- Upcoming Jobs
- Late Jobs
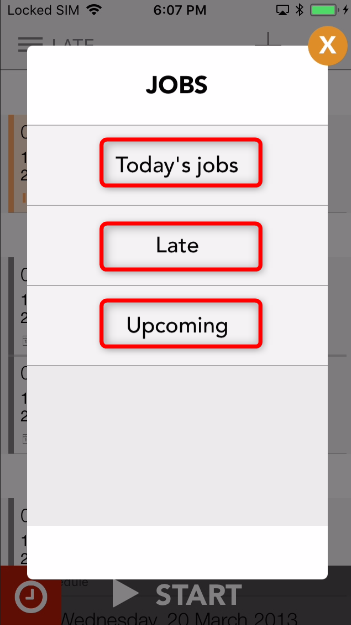
If there aren’t any jobs in either of those categories, then the category without any jobs will not appear.
Moreover, if the technician goes to one of those three categories and there is only one job in it then he will directly the job’s details.
DURATION
Once a job has been started you can see the duration of the job by clicking on the clock icon or on the button with the intervention at the bottom.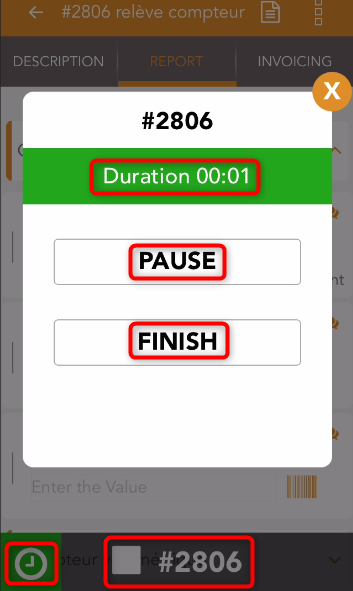
Those buttons also enable you to “Pause” or “Finish” the job.
When the technician starts a job it automatically starts a Clock In.
Nevertheless, keep in mind that when the technician finishes his job he remains in Clock In.
START AN ACTIVITY
START/FINISH
The activities that can be started from this menu only include “At Work Activities” and “Travels”.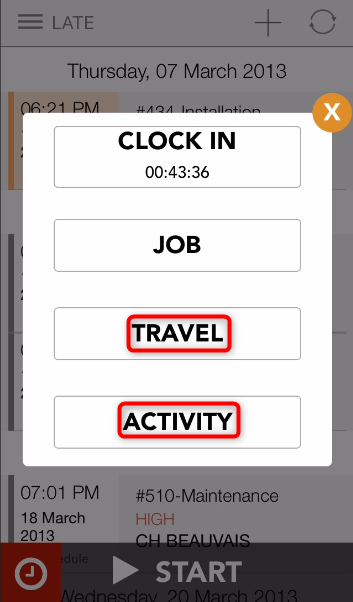
“Unavailability” activities such as holidays can only be created in the Activity tab.
Furthermore, please note that payable "Unavailability" activities can only be created by administrators or managers.
You can start different kinds of activities by clicking on “Start”
All activities classified as “Travel”, e.g. “Driving”, can be started by clicking on the “Travel” button.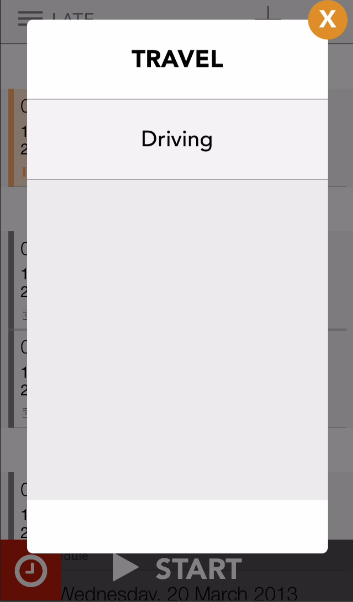
And by clicking on “Activity” you can start any “At Work Activity”, e.g. “Lunch break” or “Training”. program.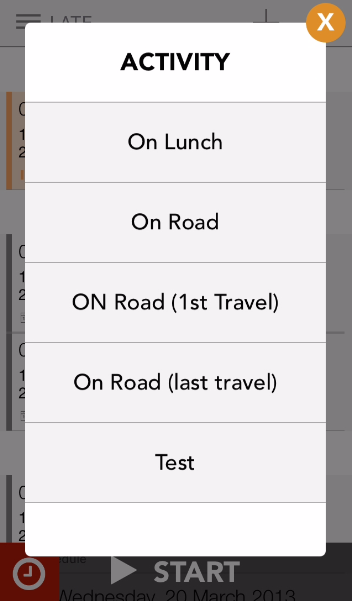
DURATION
For all activities that are not travels you will get their duration.
Once you have clicked on “Start” to start your activity you can see it’s duration, which is in the following format: hh:mm:ss.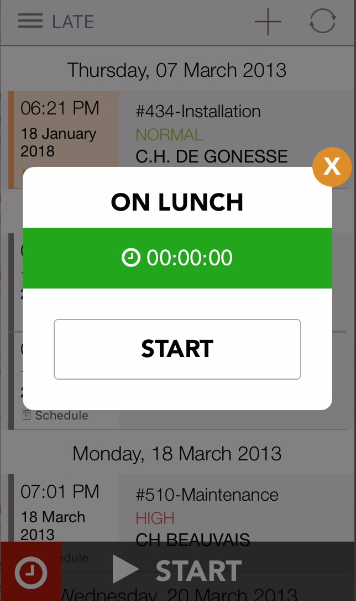
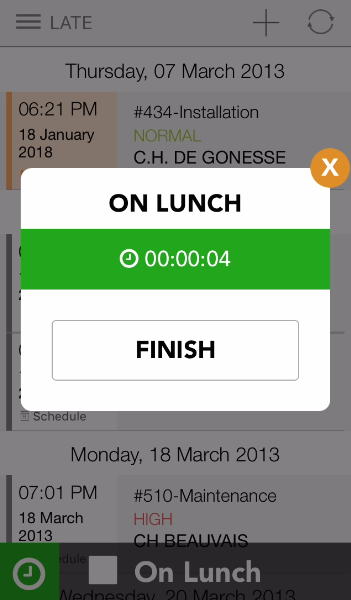
Please note that by starting a payable activity, such as “On lunch” in the example above, you will automatically be in Clock In.
Nevertheless, keep in mind that when you finish a payable activity you will remain in Clock In.
DISTANCE
For all Travel activities, you will get the distance that was travelled.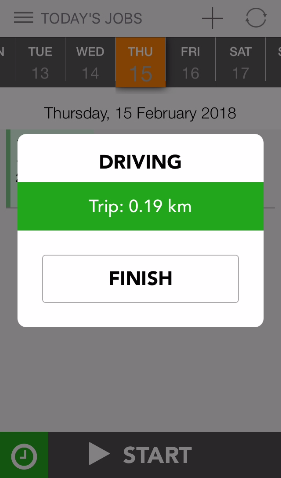
UPDATE ACTIVITY
You can update the “Activity Type” and “Description” of all activities which are not in progress.
To do so, go to “Activites”, select an activity and you can change the field where there is a pencil icon, then click on Update in order to save your changes.
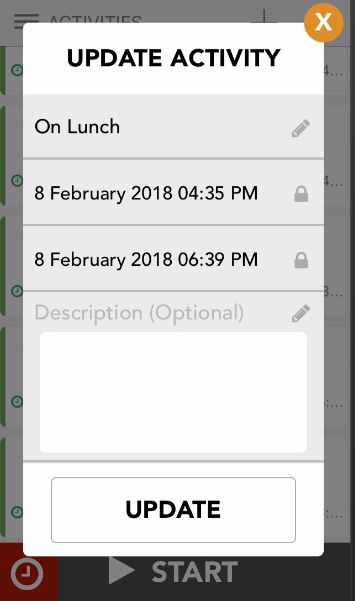
You can also update today’s activities when in “Today’s Jobs”.
Please note that for activities in progress you can only change the description.
As for the “Activity Type” you can only change a payable activity with another payable activity and the same for non-payable activities.